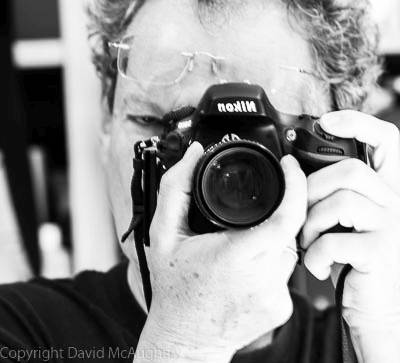
EM1x and new firmware 2.0 operation for birds in flight

This is a description of my approach to the EM1x and firmware 2.0 operation when shooting birds in flight. It’s not designed to be a fully comprehensive guide, but it does contain many tips I have learned to extract the very best out of this camera system. I am not going to describe the detail of installing and setting up f/w 2.0 for birds on the camera, and instead defer to this excellent video by Espen Helland.
If you would rather head straight to a concise summary, the TL;DR is at the foot of the page — or jump directly to the FAQ.
Camera settings for EM1x and firmware 2.0 operation
For birds in flight I shoot in manual, wide open, at 1/2000 with auto ISO set to 6400 max. I remove the tripod feet from the all the Olympus lenses, and shoot hand held for everything. I then have specific birds in flight settings for different scenarios set to each of the custom settings.
- C4 for f/w 2.0 Bird reco with 15 fps electronic-shutter – Stationary and slow moving birds
- C3 for f/w 2.0 Bird reco and 15 fps Pro-Capture Low – Birds taking off or landing
- C2 for 25 pt CAF 15 fps with -2 sensitivity – Fast – head-on birds
- C1 for 25pt CAF 15 fps and 0 sensitivity – All other fast birds
Exposing to the right

Shooting birds in flight at long focal lengths and at high shutter speeds inevitably results in high ISOs being necessary. My own experience is that the best way to minimise noise for the EM1x and firmware 2.0 operation is to expose your subject (the bird) correctly, and to expose as far to the right of the histogram as possible (ETTR), without blowing subject highlights.
This generates far better results than, for example, exposing for the general scene, and then trying to lighten the shadows in post. I find that spot metering is pretty useless for ETTR, as it requires fantastic accuracy with birds in flight, and even then will not correctly expose for the whole bird. Instead I use the OMD Highlight and Shadow indicators, which work really well to show the whole exposure of the subject. I then use auto ISO and exposure compensation to get the right exposure for the shot.
Setting up for fast exposure compensation
I have the camera set up so the front dial sets the shutter speed, and the rear dial sets exposure compensation. If I see a static subject, I spin down the shutter speed to say 1/250th and this automatically reduces the ISO. The rear dial enables me to get the exposure right for the bird. By the way, getting the bird exposure exactly right, often blows out the sky. That’s a price I am prepared to pay to get much reduced noise on the actual subject. That’s why the sky on many of my shots sometimes appears pure white, although to be fair, you get exactly the same effect with Sony cameras.
There are only two dials on an EM1x, and by default I use them for speed and exposure compensation. That leaves a problem with adjusting aperture – something I rarely do with birds in flight, as I always want to be wide open (at least in sunlight-challenged northern countries). I fix this by using the function lever. I have the function lever set to mode 1 (menu B1). This changes the dial function depending on where the function lever is set. Then I have the dial function (also menu B1) on Manual set to Shutter/Exp comp for position 1, and Shutter/Aperture for position 2. If I need to change aperture, I flip the lever to position 2.
Why I rarely change aperture
I always want to be wide open for birds in flight in the UK. To ensure that happens, when I set the custom C1-C4 settings I ensure the aperture is wide open with a fast lens attached (say a 1.8). Then if a different lens is put on, the aperture always defaults to its lowest aperture value. If for example you set up your C1-C4 to be wide open with the 300mm f4 on at the time of setting, and then changed the lens to the 40-150 f2.8, the aperture C1-C4 would be f4 instead of f2.8. You would then need to adjust the aperture to get it to f2.8. If you had set up C1-C4 with the 25mm f1.8 for example, the default aperture of the 300mm would be f4, and the 40-150 would be 2.8 as they both go to their lowest possible setting when you attach them.
Setting up Highlight & shadow indication
To set up viewfinder indication set up for over and under exposure, go to Menu D1/Info settings/LV-info/Custom1/ Highlight&shadow). I only have one viewfinder info option set up for birds in flight and this is always programmed into C1-C4, so I always see the over/under exposure indicators. I can then quickly spin the rear dial to get the bird exposed right.
I typically increase the exposure comp until I start to see orange overexposure indicators on the bird, then back down slightly. I can usually do this as I am beginning to get focus lock on the bird, so by the time I am firing, I have the exposure and ISO about right. One challenge is that the next time you shoot, the exposure compensation may be way off. I correct this just by flipping to a different Custom setting and then back, (which resets the exp comp to zero again) in between bird shots.
Setting up highlight and shadow thresholds
Exposing to the right has the inherent risk of blowing out highlights. To prevent this, I back off the indicators from the 255/0 levels that are the default.
The Highlight & shadow thresholds are set from the histogram settings (menu D3) and I have highlights set at a conservative 252, and shadows at 3, to ensure I don’t accidentally clip.
Exposure summary

This exposure method is critical in extracting the best performance from the OMD cameras for birds in flight. The classic example is a dark kite against a clear sky. Normal matrix metering would underexpose the kites, and require shadow boosting in post, often beyond practical limits. Pre-setting ISO (i.e. full manual) does not allow instant adjustment of the exposure depending on the bird’s location relative to the sun.
But rapid exposure compensation based on highlight/shadow management, as above, combines ISO and exposure adjustment on the bird itself, and hence gives the highest quality, lowest noise image. It is also massively helpful when you are shooting white birds one minute and dark birds the next.
This is one reason why I find the noise performance of the EM1x and pro lenses to be on a par with any other camera system I have tested. In fact, the accuracy and speed of exposure compensation is one of the hidden reasons why for me, the Olympus system is so much better than Sony, for which both the zebras and the exp comp dial are verging on unusable IMHO.
Pro capture
Pro capture may be the defining benefit of the new firmware 2.0. It’s not intuitive to use though, and can result in a bafflingly large numbers of motionless bird photos. Here’s how I set it up to get the best out of it.
Pro Capture is set up from menu C1/Burst L settings/Pro Cap. I use the L setting for Pro Capture (P-CL) and electronic shutter, so there is no blackout and you get full CAF. My P-CL settings are 15 fps Electronic L, and pre shutter frames of 15, although I might go down to 8, as my reactions seemed to have improved lately. I use electronic shutter not only for the capture rate, but also for a somewhat Scottish desire to keep the shutter count down for when I want to sell the camera (e.g. for MPB, it’s a max 10k shutter count to get their ‘as new’ price). In future I might try mechanical with f/w 2.0 bird recognition through, as it might reduce the processing load and free up more grunt for the tracking.
To initiate Pro capture you half-press the shutter button to activate continuous focus and buffering, and full press when the bird takes off. I find it quite difficult to reliably half-press for long periods of time, particularly if it is cold (less sensitive fingers). As Pro Capture can only be used with electronic /silent shutter, there is no audible indication of fully pressing the button and I often find I have taken hundreds of uninteresting shots of static birds as a result. If P-CL works properly you will absolutely get shots of the bird taking off. If you don’t, it may be because of the above problem.
It would be way better if the pre-capture could be on the AEL button, and the actual capture on the shutter button, to definitely separate the two, but AFIK, it is not possible for some reason. One check to see what is happening, is that there is a little green circle made of two little arrows next to the Mode icon in the bottom left of the viewfinder, when it is in the constant recording mode, but when the shutter button is fully down, the Mode icon disappears, and a little SD card icon in orange shows up to its left.
For me P-CL is best for birds taking off, like owls and Ibis. It is less successful in catching them after a few seconds flight. For the latter I use regular CAF 9 or 25 point depending on the size of the bird.
Other settings
F Scanner: Mode 3 – but never noticed much difference between mode 2 or 3
C-AF Release Priority: Release, although I don’t find it makes much difference. I get Out of Focus frames with either release or focus priority
C-AF Center Start: On for 3 and 5 point, off for everything else
C-AF Center Priority: On for 3 and 5 point, off for everything else
Image Stabiliser: S-IS auto
AF Limiter: on. I have these set up in advance for different scenarios and baked into the C1-C4 presets. I rarely have it set for longer than 150m, as at that distance the bird will be too small in the frame anyway. I have the upper front function button set to AF limit, so I can spin to the right distance if the situation changes. I have the 3 limiter settings at 3-150, 10-150, and 20-150, depending on the closest distance. TBH, I have never noticed a huge difference with AL distance limiting on or off, but I have it set in principle.
TL;DR
- Manual exposure (M mode), wide open, 1/2000s minimum, auto ISO to 6400: baseline EM1x setup for all birds in flight scenarios.
- Four custom presets (C1–C4): Bird AI tracking for stationary/slow birds; ProCapture for takeoffs/landings; 25-point CAF with sensitivity tuning for fast action.
- Expose to the right (ETTR): use Highlight/Shadow indicators (not spot metering) with exposure compensation dial to maximize SNR on the subject.
- ProCapture (P-CL) 15fps electronic shutter, 15 pre-frames: half-press to buffer continuously, full-press on action for guaranteed keeper at takeoff/landing.
- Supporting settings: AF Limiter on (3–150m depending on scenario), S-IS auto, CAF Release Priority = Release, highlight threshold 252/shadow 3 to avoid clipping.
Frequently asked questions
Why expose to the right instead of spot metering?
Spot metering on a moving bird requires frame-by-frame precision; Highlight/Shadow indicators show the whole bird’s tonal range. ETTR with exposure compensation dial is faster, more accurate, and produces lower noise by maximising signal on the subject (not the scene).
How do I set up the Custom dials for speed?
Front dial = shutter speed, rear dial = exposure compensation. Use the function lever (mode 1) to toggle between Shutter/Exp Comp (position 1, default) and Shutter/Aperture (position 2, for rare aperture changes). This frees both dials for instant shutter and exposure adjustment.
Why set up C1–C4 presets with a fast lens attached?
Each lens remembers its widest aperture. If you set C1–C4 with a 300mm f/4, switching to a 40-150mm f/2.8 won’t default to f/2.8. Setting presets with the fastest lens (e.g., 25mm f/1.8) ensures any attached lens defaults to its maximum aperture.
What is ProCapture and when should I use it?
ProCapture (P-CL mode, 15fps, 15 pre-frames): half-press buffers autofocused frames continuously; full-press captures past frames—zero shutter lag on takeoff/landing. Best for static subjects (owls, ibis). For in-flight action, standard 25-point CAF is more reliable.
How do I avoid hundreds of static bird shots with ProCapture?
ProCapture requires precise half-press to activate buffering. In cold weather, fingers lose sensitivity. Look for a small green arrow icon (left of mode) to confirm buffering is active; this disappears and an orange SD icon appears when you fully press. Toggling to a different custom setting resets exp comp and starts fresh.


