Post-processing workflow for birds in flight
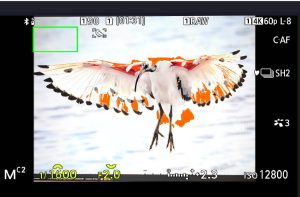
Here is a quick run through of my post-processing workflow for birds in flight. It is designed to get the best possible final images of birds, which directly out of the out-of-camera are frequently noisy, heavily cropped, and at the focal limit of the lens. These images need all the help they can get, and this is how I try to make them sing, without generating garish results.
Culling – the essential first step in the Post-processing workflow
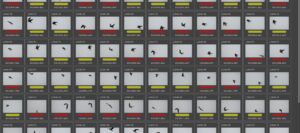
I cull, or cut down, the images on a laptop either in the hotel or restaurant if I am travelling, or in my lounge if at home. Culling is pretty critical for birds in flight, as there can be thousands of images per day, which are completely impractical for viewing and culling in Lightroom. My preferred method of shooting is to look at the ‘rushes’ as soon as possible – so I can get an immediate idea of how the shoot is going, including the percentage of shots in focus. It also ensures I properly back up the storage cards. If possible, I will cull all the morning images at lunchtime for example, and then once all the images are backed up, I reformat the card and start all over again for the afternoon session.
FastRawViewer is my culling choice over Photomechanic. It allows rapid viewing of the actual raw files, with the ability to closely examine sharpness, detail, and over and under exposure, with quick exposure adjustment so you can see just how the processed photo would look. In addition, you can set ratings and attributes for direct import to LR classic, as well as bulk delete or transfer images to subfolders to segment the shoot. I tag every image for sharpness, and also whether they are a keeper. I then only import keepers to my main system. Usually on a session of 1000-2000 images, I only import 100 or so to Lightroom.
Lightroom as the post-processing workflow mother ship
I use Lightroom as the hub and repository for all image processing. Once images are imported, I I enter them into a highly structured workflow system which is built on smart collections. I will cover this workflow in a later post, but it ensures that I run through a standardized process for every image that makes sure that critical areas like keywords, location information, IPTC data, and portfolio labelling is done for every final portfolio image, and that all the image sets used for portfolio shots are preserved. This structured workflow is the heart of my image processing methodology, and is the reason I will probably never leave Lightroom no matter how tempting the alternatives are. However as you will see I do most of the actual image processing through plugins and do minimal image processing in the mothership itself.
Image processing
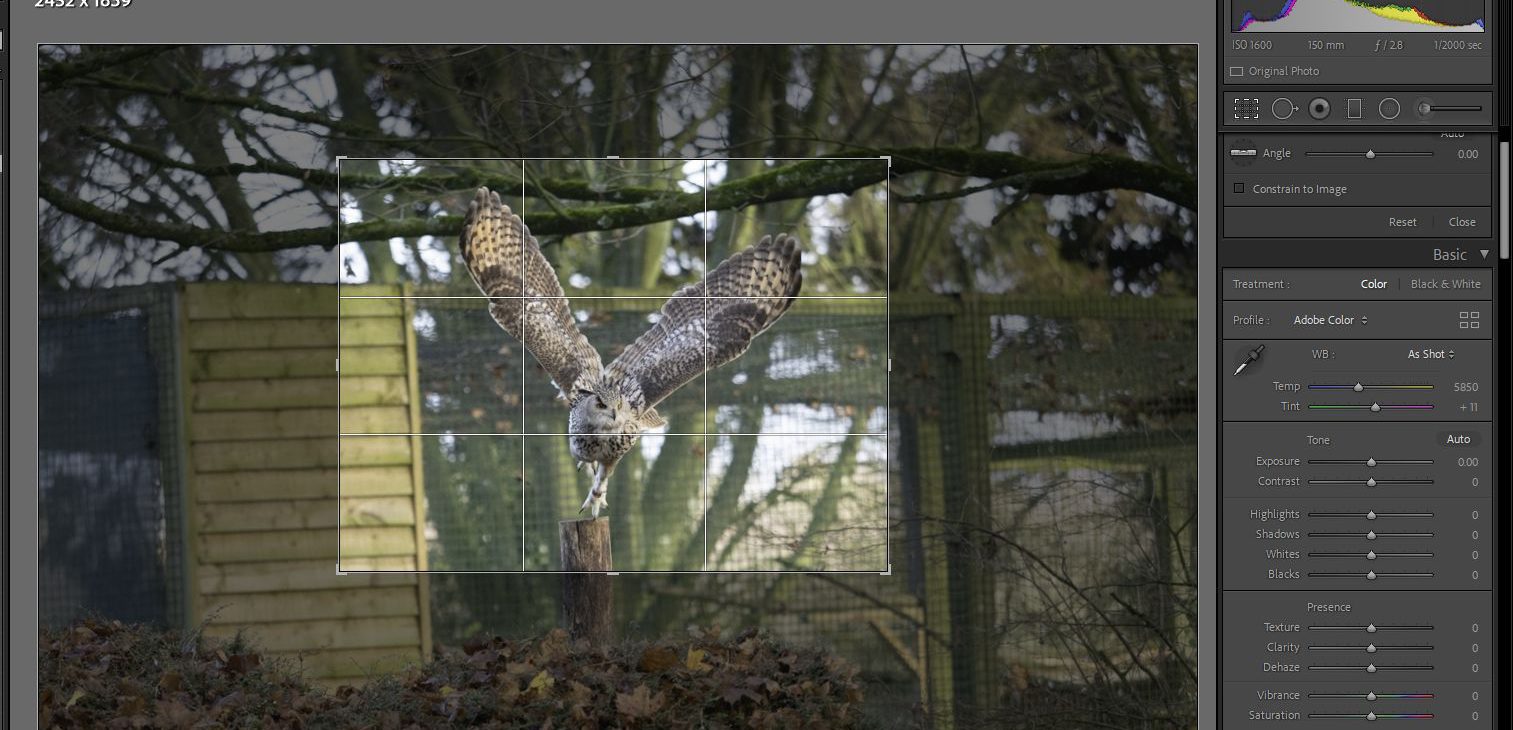
Every step of this process is shown in the screenshots below. Click each one to get a lightbox view.
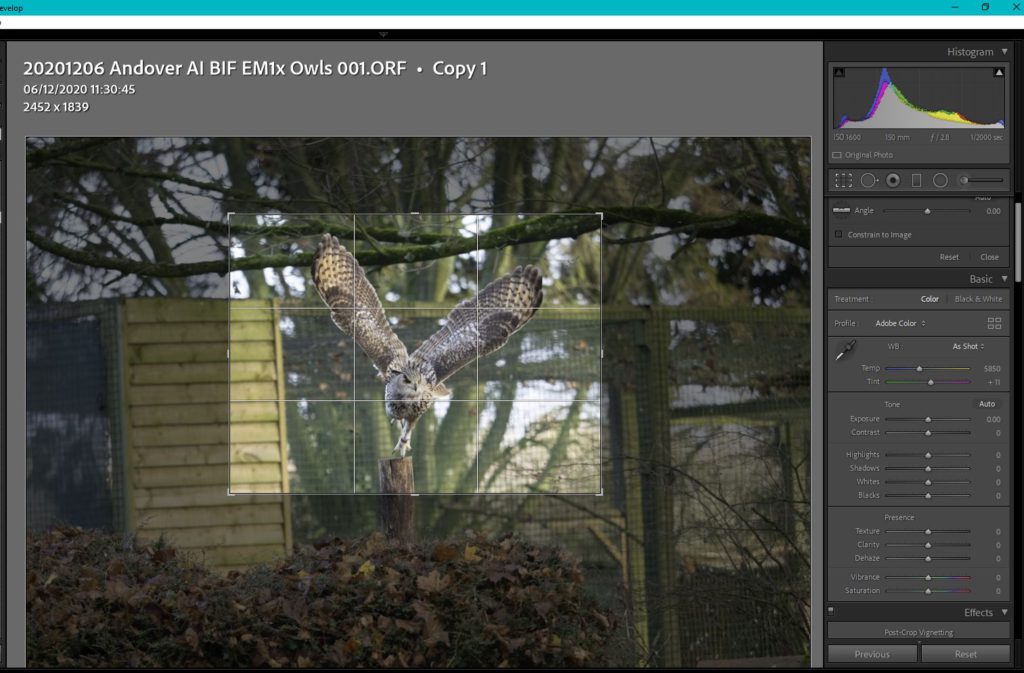
Once In Lightroom, I turn off any sharpening, and make small adjustments if necessary to the tone balance. This is rare, as I am careful to expose the subject correctly in camera. I then crop the image, slightly larger (by about 10%) than the likely final size. Cropping the image first dramatically reduces the noise processing time, but allowing 10% wiggle room allows for second thoughts on the final version.
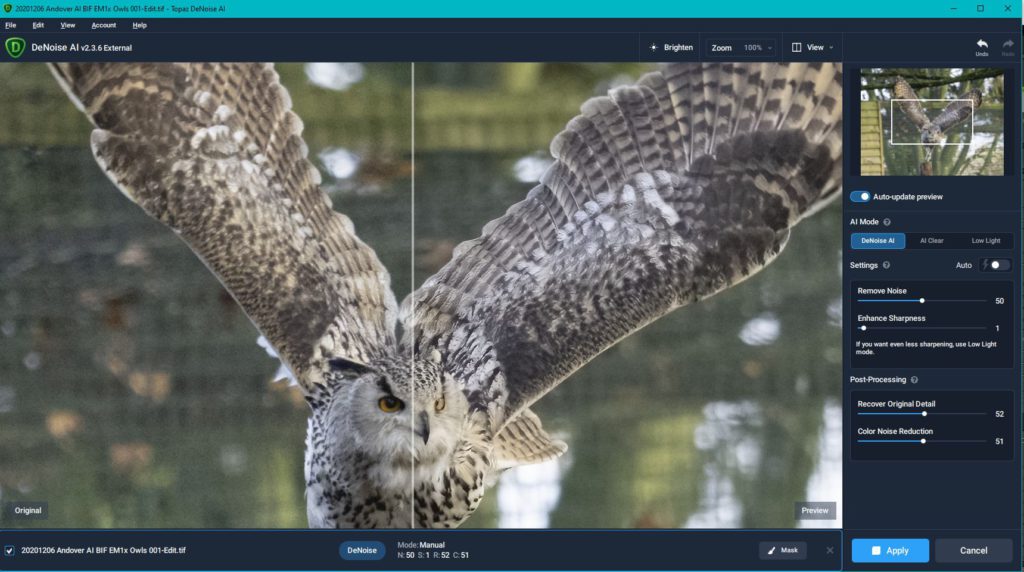
The image is then sent for noise reduction. At the beginning of this year my preferred noise treatment was Dxo Prime, but I have found that Topaz DeNoise AI is better, faster and easier to use with Lightroom, particularly for bulk images.
In Topaz, I have preview turned off for speed. The software now remembers your previous settings, so I just click start, and the image is done in around 20 seconds or less.
For images up to ISO 3200 I set the denoise at 50, with sharpening at the minimum, and detail recovery and colour noise set to around 50%.
I find there are very few artifacts, at least without obsessively magnifying the image and deliberately looking for issues.
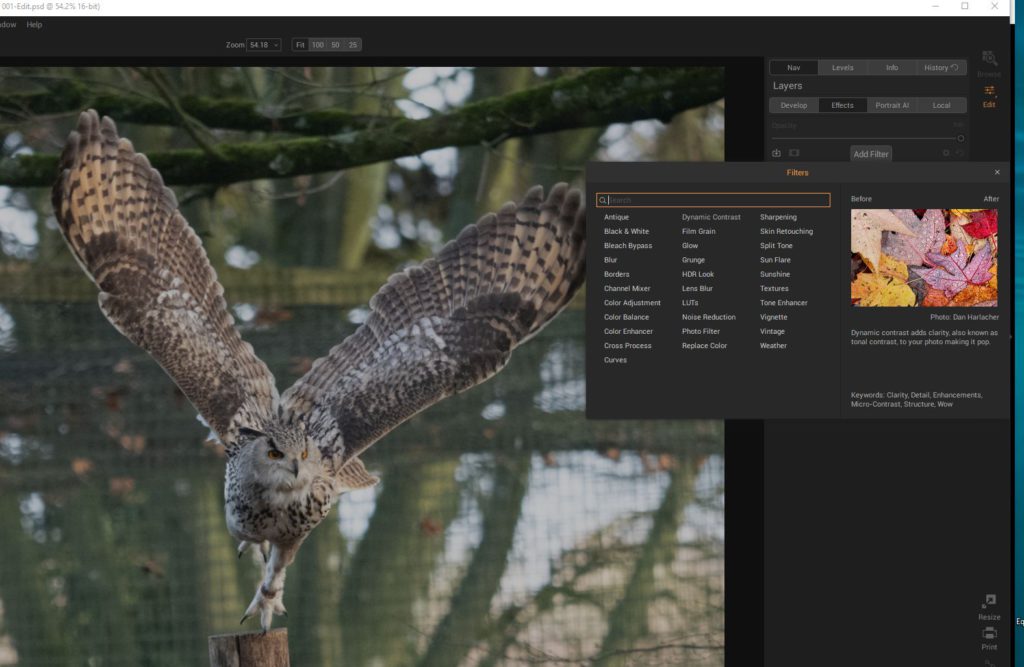
Once back in LR, I send the denoised image to the Effects module in On1 Photo Raw 2021 for Dynamic Contrast treatment. On1 is a fantastic bit of software, which can be used as a complete replacement for Lightroom and Photoshop. I am far too committed to to smart catalogues in Lightroom to ever make the move, but the Dynamic Contrast and Clone Stamp features are excellent and can be used as a plug-in from Lightroom. All the effects in On1 are applied as non-destructive layers, which are Photoshop compatible. This is a huge bonus as we will see.
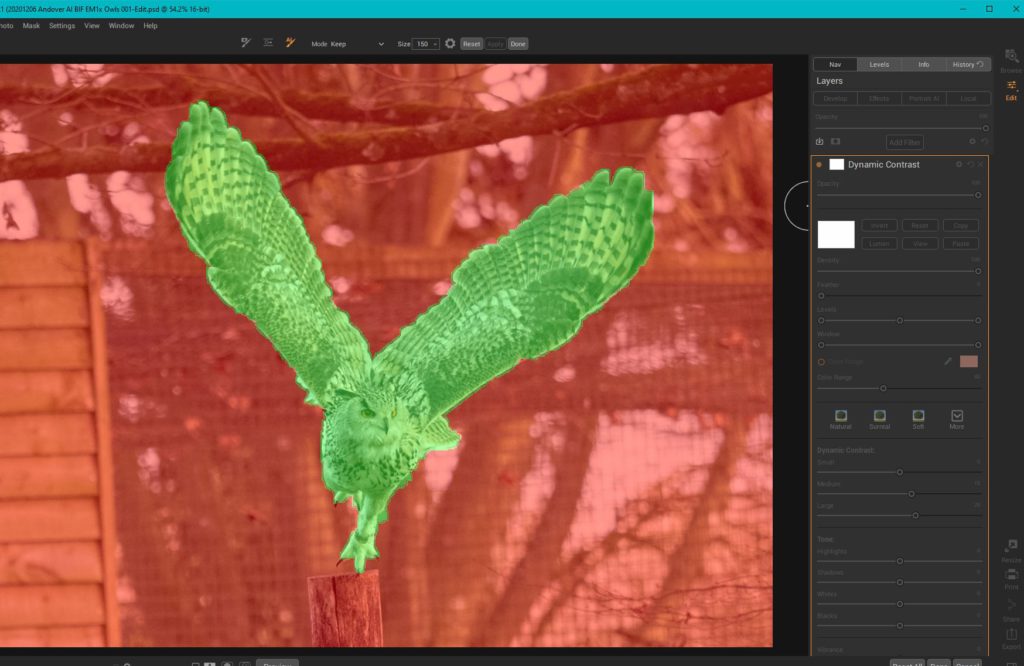
Every effects layer in On1 is able to use the AI masking tool. It enables a very accurate mask to be created in seconds, that is extremely helpful for getting precise contrast. I don’t use it for every shot, but in scenes like this with a lot of background, it can be used to really make the bird ‘pop’. Masking does not require intricate work – you just draw a rough outline inside and outside the birds, and allow the AI to do it’s work. It’s fast and accurate. Once the bird is masked, I make the dynamic contrast adjustments.
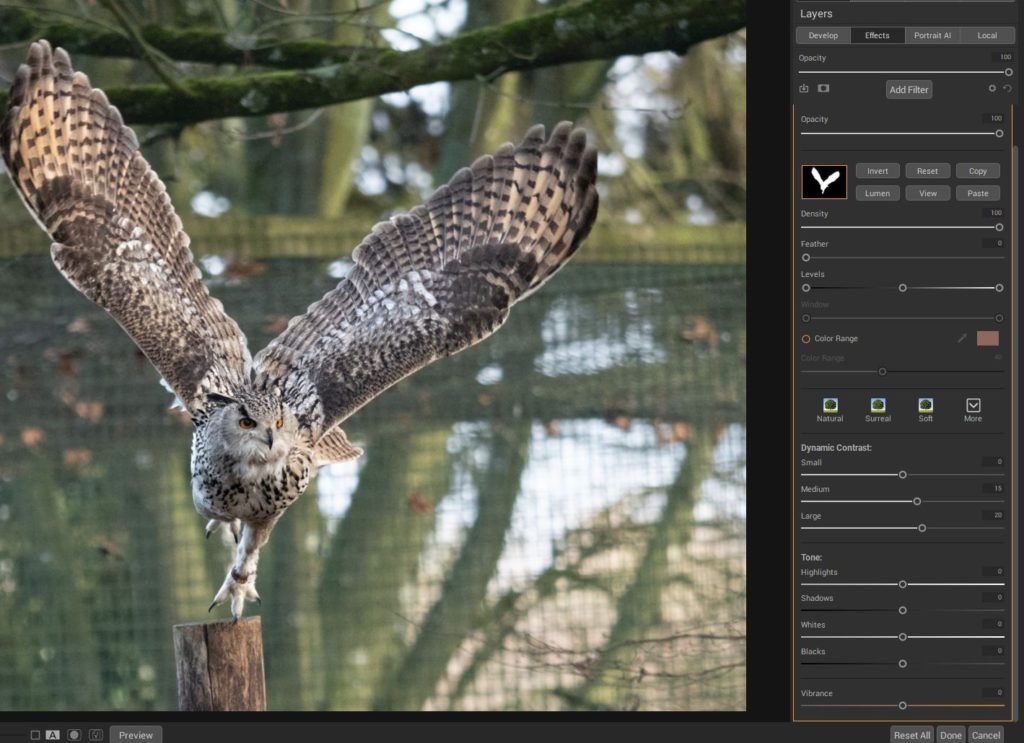
Dynamic contrast is a very powerful tool but it can easily be over done. It allows micro contrast to be adjusted at three levels: very small detail, medium detail and large detail. Large detail in particular is very effective for bringing out the beauty of big wing feathers. Small detail can be overdone and can lead to crunchy artefacts particularly around the bird’s head or out of focus areas. After a few admonishments in this area, I tend to take the conservative default settings and tweak the large detail slider if necessary. To ensure the effect is subtle, I keep a magnified version of the same image open in LR, so I can easily compare the two and ensure I am not introducing artifacts. The benefit of masking the image is that the dynamic contract is not added to the background. As the only thing being changed at this stage is detail, the masking effect is very subtle. There are also slider controls for tone and vibrance, so the bird alone can have very precise tone adjustments made without altering the rest of the scene. If carefully done, this can also help the bird ‘pop’. But this needs to be subtle or the tone differences at the mask edges will look unnatural.
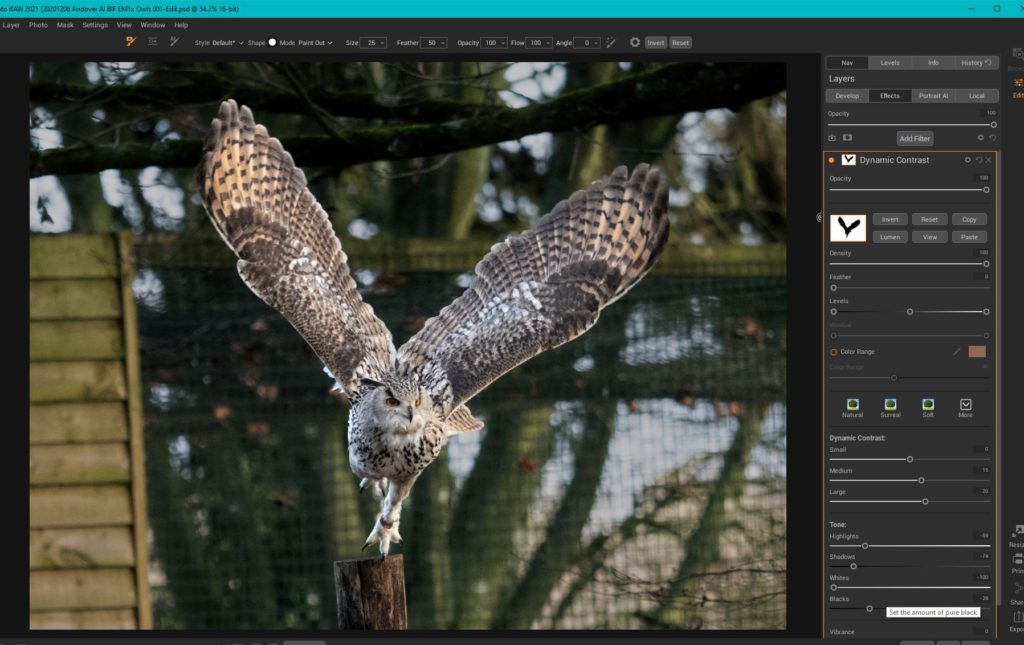
Now we come to the second great benefit of masking. The mask can be copied, and then applied to a second dynamic contrast layer, and inverted. This then masks the bird, and only the background is affected. You can see the inverted mask icon in the dynamic contrast panel of the second effects layer in this screenshot. This then allows you to subtly reduce the contrast in the background, and also do background tone adjustments. In the screenshot to the left, the background exposure has been reduced, without changing the bird’s exposure. Again, this needs to be handled carefully for a subtle effect (it is exaggerated here for effect) . The vibrance can also be slightly reduced also, and if handled carefully, this can also help the bird pop.
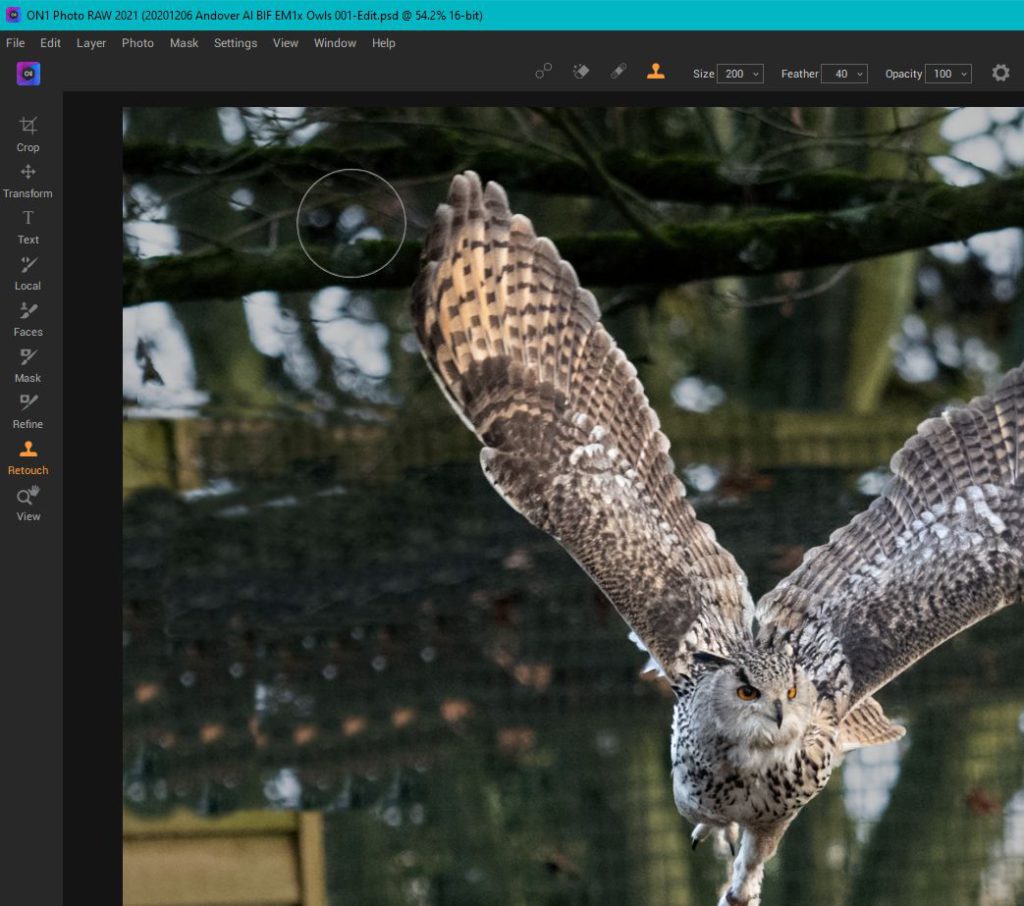
Finally, if necessary, I remove background distractions from the image. I used to do this with Photoshop content-aware fill or clone stamping, but the new clone stamp tools in On1 2021 get me the same effects, faster and with the same results. For example, here I have removed the fence on the far left for the final shot. The clone stamping is not too elegant for this demo shot, but almost anything can be removed within a few minutes with care.
Finally, I return the image to Lightroom. to do final cleanup, keywording and metadata, location info, and portfolio labelling.
Final results
I have developed this workflow over many years, but the tools available this year in particular allow real post processing power to be applied to generate harmonious and pleasing results. It’s easy to overdo the effect, and I have been guilty of this, but with care, this can be handled to produce images that are true to the scene, and which get the most out of the camera system. In this album, I show the before and after effects of the above methodology.
The first image of each pair is the final version, to which a small amount of “On1 Photo RAW” dynamic contrast (DC) has been added, along with tonal adjustments (for some photos, background distractions have also been removed). The second image of each pair, labelled “Owl-Pre DC-xx” is without Dynamic Contrast applied. These images have received noise reduction (but no sharpening) in Topaz Denoise and for this comparison, have been cropped and given some Lightroom exposure and contrast adjustment to match the final images. Hopefully you can see subtle changes, but minimal artefacts, or eye-jarring boundaries in the final images compared to those without Dynamic Contrast applied.
