My OM1 birds in flight settings

This is a description of my approach to the Olympus OM1 (any version) when shooting birds in flight (BIF). This is super technical and only intended for those owning an OM1 or thinking about it.
This is a companion to my settings for landscape and long exposure photography. The OM1 is an extremely sophisticated camera, with 400-500 settings that can be changed, and a multitude of computational features. These can all be saved into 4 custom settings, typically one for each major genre. This enables the OM1 to be fine-tuned for very efficient photography workflows across a whole range of photo genres like BIF, landscape, macro, astro and street.
I have already written about why the OM1 system is so special for Birds in Flight photography. The information below provides all the tools you need to exploit those special features. I save all these birds in flight settings to a custom setting on the camera which is available as soon as a BIF situation appears.
The problem for me, and I suspect many other photographers, is that months can go by where I don’t take a BIF photo. Then, when I go out with the camera, I cannot remember how I set up the system, and the camera doesn’t tell me much either, as most of the key settings are buried in the menus.
To help me remember, I have written “cheat sheets” for each genre. Before I go out, I have a cup of coffee and scan the cheat sheet, to refresh my memory about what the buttons do, how the camera is set up, and how to take shots. The info is in a word file, and formatted in A5 size, so it can easily be read on a mobile phone. I have a set of 5 cheat sheets (one per genre) for the OM5 and the OM1. It occurs to me that these cheat sheets might be helpful to other OM1 photographers. I also provide the actual settings files so you can install this setup as a custom setting on your OM1.
Who are these birds in flight settings for?
If you are happy with running the OM1 in shutter priority and living with the occasional blown-out image or unrecoverable shadows, this is not for you. I would argue that you are wasting the core benefits of the camera for BIF, but you are in good company – this is how most BIF photographers shoot.
These custom settings and workflow are oriented towards getting the absolute best from the most difficult scenarios – white birds against a dark background, dark birds, backlit shots, and fast changing light conditions. Using the workflow to its fullest extent will get you shots that are better exposed than many full frame cameras.
Blimey, this all looks really complicated
It’s not that complicated. You need to understand why and how you should use auto-iso and exposure compensation for perfect exposure every time. Read this post in detail on how to set it up, and watch this video from Simon dEtremeont for why you should use it. Along with the cheat-sheet, I have provided install files for the BIF custom setting on your OM1 Mark I or Mark II. You can install just this single custom setting via the OI share phone app or OM workspace on your PC (save your existing settings first if you have any).
Once the camera is set up, all you need to do is follow the cheat sheet recipe for each specific scenario. Then 90% of the complexity goes away, and you can start making spectacular BIF images that get the very best from your OM1. I would argue that without this kind of customisation, it is almost impossible to use all the OM1 features. But with it, you just select the right tool for the scene.
The files
Below I provide the MS Word file for the cheat sheet, the configuration files you can install on your OM1 Mark 1 or Mark II to get exactly the same settings, and finally the link to the giant spreadsheets of all settings for these cameras.
| BIF OM1 cheat sheet MS word file: | OM1 BIF cheat sheet |
| BIF Custom file for OM1 Mark I | OM1 BIF custom settings |
| BIF Custom file for OM1 Mark II | OM-1 II BIF custom settings |
| Giant spreadsheet of all OM1 Mark I settings | OM-1 Mk I Settings DMcA Excel |
| Giant spreadsheet of all OM1 Mark II settings | OM-1 Mk II Settings DMcA Excel |
And below is the cheat sheet for both models. The cheat sheet assumes this custom setting is on C2, but you can put it on any custom mode you wish. One major tip – read the notes for more explanations of settings.
Birds in flight settings cheat sheet for the OM1
Birds in Flight Physical camera settings (I check all this before taking any shots)
- Function lever: position 1: Exposure compensation on the back dial, Shutter on front dial (note 2). To change aperture, change to FL position 2: Aperture on the back dial, Shutter on the front dial, then flip back. For explanation, see post on exposure compensation.
- Make sure Focus Limit, HR, BKT, LND, NLV/SOVF are off .
Preset C2 Settings (check these on the Super Control Panel and main screen).
- Exposure:
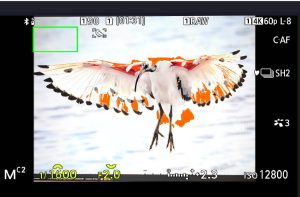
- Mode: manual
- 1/2000s silent (but spin up for small birds, and spin down for stationary birds)
- SH2 25 fps for flicker free viewfinder
- Pro capture off by default but PC settings are: SH2 – 50 FPS, 20 pre-shutter, limit off, SH1 – 100 FPS, 30 pre-shutter, limit off.
- Aperture wide open (note 1)
- ISO max 12800. Auto ISO is essential if SS and Aperture are fixed.
- Highlight and shadow view only in EVF and monitor (no clear screen view via info button – note 3 ).
- Focus:
- CAF, bird recognition on. Tracking off.
- Focus area: large. “Set home” focus area: small
- Focus limiter off, but assigned to top front button, select via back dial. Settings: On1: 3-50 On2: 5-20, On3: 20-300.
- Focus clutch off (in settings) so accidental jarring of the physical clutch has no effect
- AF by half pressing shutter button: on.
- Back button focus on
- Sensitivity 0
- Focus beep on
- Focus Scanner: Mode 3 – but never noticed much difference between mode 2 or 3
- C-AF Release Priority: Release, although I don’t find it makes much difference.
- C-AF Center Start: On for 3 and 5 point, off for everything else
- C-AF Center Priority: On for 3 and 5 point, off for everything else
- Other
- IS: On, auto
- WB auto, NR auto for mechanical, off for silent shutter. Monitor brightness 0,
- Save to slot. 1 (Note 4)
Button assignments (simple to avoid surprises)
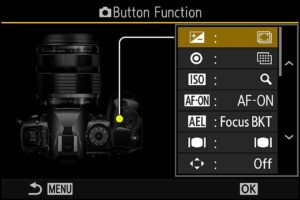
- +/-: Magnifier
- Record button: Subject detection on/off
- ISO button:OFF
- AF on: AF0m back button focus
- Lower front button: Focus limit
- Upper front button: Focus limit:
- Record button/back dial: Subject recognition choose
- AEL: AEL on OM1 I, Subject selection/lock on OM1 II
- Multi-selector center button: home position plus small focus area.
B. Shooting technique
Birds in flight – sky background
Aim towards bird, check bird exposure with light/dark display, and adjust exposure compensation with rear dial. When exposure correct, press button, spray and pray. If close up engage focus limiter On2, if in distance engage on3.
Birds in flight or stationary – foliage background,
Press home button (joystick centre) to reduce focus area to small, and possibly engage focus limiter. Spin down shutter speed for stationary birds
Perched birds taking off or landing
Switch to Pro-capture via four-way switch down button. Press home button for small area. Engage focus limiter On1. Watch left bottom to ensure pro capture operating, and left top to see when card writing is finished.
Notes
BIF shooting is fast, and I would rather not have the camera in some unexpected mode when I use it. So, many buttons are turned off and options are limited.
- I always want the aperture to be wide open for birds in flight in the UK. To ensure that happens, when I set these custom C2 settings, I ensure the aperture is wide open with a fast lens attached (say a 1.2). Then, if a different lens is put on, the aperture always defaults to its lowest aperture value.
For example, if I attach the 300mm it will start up in C2 at its widest aperture of f4, but if I swap to the 40-150mm it will open to f2.8. That way you are always ready to go, and don’t have to check the aperture before starting. - Exposure for the whole scene or matrix exposure doesn’t work well if there are black or white birds being photographed. They will respectively be under or overexposed relative to the rest of the scene. The approach I use is to have instantly accessible exposure compensation and over and under exposure indication via blinkies. When focusing on the bird adjust the back dial to ensure that there are neither blue or red blinkies on the bird and then shoot. Having the function lever in position one ensures this will happen. However, it’s necessary occasionally to change the aperture on the lens and to do that switch the function lever to position two. See this post for detail.
- For this method to work, it’s essential that the blinkies are in effect. If there are multiple options for the info screen display it’s highly likely that the blinkies may not be operational, and it’s hard in normal light to tell. So I remove all other options for display, and blinkies are the only thing that will show.
- I always keep a high-speed 64G card in slot 1, and a slightly lower speed 256 GB card in slot 2. For Landscape and Macro, where the capture rates are low, I save to card 2 by default. I rarely reformat the card, and just use it without checking for months at a time. For BIF and street, where the frame rates are high, I save to the high-speed card, and usually take the card out, and transfer the files and reformat every shooting day.
